Sometimes I get a little foggy in the cerebral section of my body, and I have to search a bit for recipes worth sharing with you. It’s not for lack of inspiration or inventory. Like I said, I get a bit foggy. It is this fog that is my excuse for not sharing this wonderful recipe with you sooner because I make it quite often for many occasions. I give it to people as birthday presents, we put it in the welcome bags at our wedding, and my husband requests it with frequency. It should have been an obvious recipe to share.
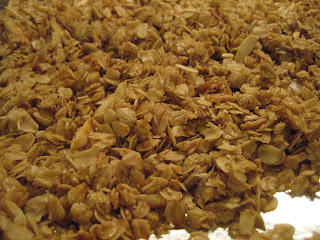
It’s granola: really good honey-laced, loaded with fun stuff like coconut and sunflower seeds granola.


It’s the kind of granola you want to eat directly from the jar, or take on a hike, or top with blueberries and yogurt for breakfast. It’s sweet enough to satisfy a sugar craving in a pinch, but substantial enough to eat for a meal or after exercising. For me, the best part is each bite reminds me of childhood trips to Santa Fe, New Mexico where we would stay at the Grant Corner Inn. This granola was a regular part of their breakfast menu as was locally roasted coffee served in this cute mug:
The Grant Corner Inn no longer exists, I am sad to say. It was centrally located near the Plaza, had a wrap-around porch, charming and clean rooms, and delicious breakfasts. Lucky for me, and now you, the Inn published a cookbook which includes this granola recipe.
GRANT CORNER INN GRANOLA
Adapted from The Grant Corner Inn Breakfast & Brunch Cookbook by Louise Stewart. 1986. Yield: 10 cups
Vegetable Oil ¾ cup
Honey ¼ cup
Brown Sugar, packed 1 cup
Vanilla 1 teaspoon
Kosher salt ½ teaspoon
Rolled oats (not quick) 8 cups
Almonds, slivered, toasted ¾ cup
Sunflower seeds, unsalted, roasted/toasted ½ cup
Coconut, flaked, dry ½ cup
Preheat oven: 325 F. Place rack on middle shelf.
Prepare two baking sheets: line with foil and then lightly grease with the same vegetable oil you are using for the recipe. I use just a tablespoon and spread it around with my hands.
Combine oil, honey, brown sugar, vanilla and salt in a medium (2 quart) saucepan. You can leave this on low to medium-low heat while you measure the other ingredients into a large bowl. Do NOT heat over high heat and walk away because you might overcook the sugar and have an undesirable clean-up situation on your hands. Stir occasionally until the sugar melts. This is not an emulsion so the oil and sugar will not combine.
While the sugar mixture is cooking, combine the other ingredients in a large bowl. Pour the sugar over and stir quickly for even distribution. Small clumps are fine, but large clumps should be broken up. At this point, the original recipe says you can use your hands to mix the sugar into the dry ingredients. DO NOT DO THIS if you value the skin on your hands. A large wooden spoon works fine. If the mixture sticks to the wooden spoon you can scrape it off with a regular silverware spoon.
Divide evenly the granola mixture between the two pans. I usually bake one at a time. Depending on your oven’s actual temperature (an oven thermometer is handy gadget) and even distribution of heat, it should take 10 to 15 minutes to bake. Every five minutes during baking, stir the granola by bringing all the mixture from the edges into the middle, incorporating it, and then leveling it off. The edges tend to cook faster than the middle section. Also, your oven may be hotter in back than in front, especially since you are opening the door every five minutes to stir, so rotate the pans once during baking. Once finished baking, place on a cooling rack to cool completely.
Once you have baked and cooled both batches, break up any large clumps, leave the little guys, and combine both batches together in an airtight container. Can be stored for up to 10 days.
Note: Do not make this on a humid day. You need the granola to completely dry out during the baking and cooling processes. When it is humid, this will not happen, and the granola ends up being sticky and a bit soft instead of crunchy. Further, it will not keep as long because of the undesired moisture content.


